General information about auto-posting payments in EZClaim
To easily navigate this article, use the links provided below. At the end of each section, click "Back to Top" to return to this menu.
Please see the available YouTube videos about Auto-Posting in EZClaim!
The Auto-Posting View and Options
The auto-posting process enables you to efficiently process payment information received in the 835 file, which serves as the electronic equivalent of the paper Explanation of Benefits (EOB).
Accessing EDI Reports
SFTP submitters typically obtain their ERAs by clicking the Get Reports button on the right side of the screen.
Alternatively, ERAs can be downloaded from payer websites and then added to EZClaim by clicking the Add Reports button and navigating to the location of the saved file.
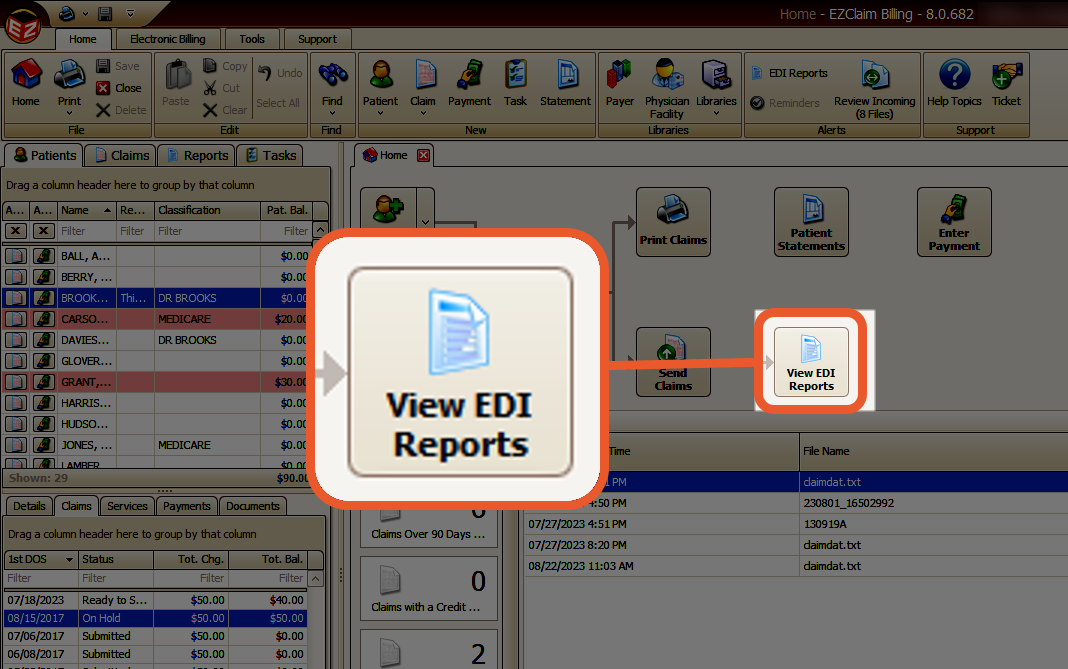
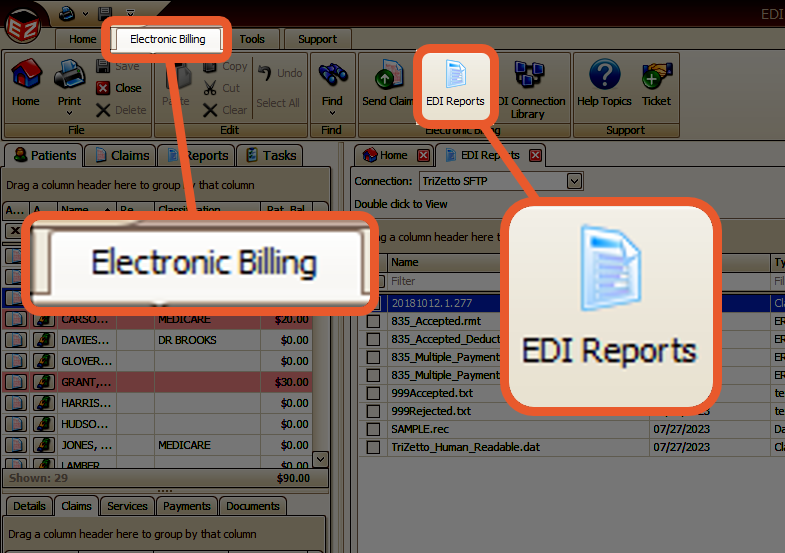
- From the Home screen, click View EDI Reports – or, from the Electronic Billing tab, click the EDI Reports button.
For information on adding EDI reports, see Adding EDI Reports.
Auto-Posting the EDI File
- To initiate the auto-posting process for the 835 file, simply double-click on the desired file
- EZClaim will then prompt you to confirm the payer
- If the displayed payer does not match your payer library entry, you can select the correct payer from your claims using the drop-down box. The program will attempt to identify the correct payer by searching for payers with the same payer ID, and then selecting one with the same name.
Note: The chosen payer does not necessarily have to match the 835 payer information.
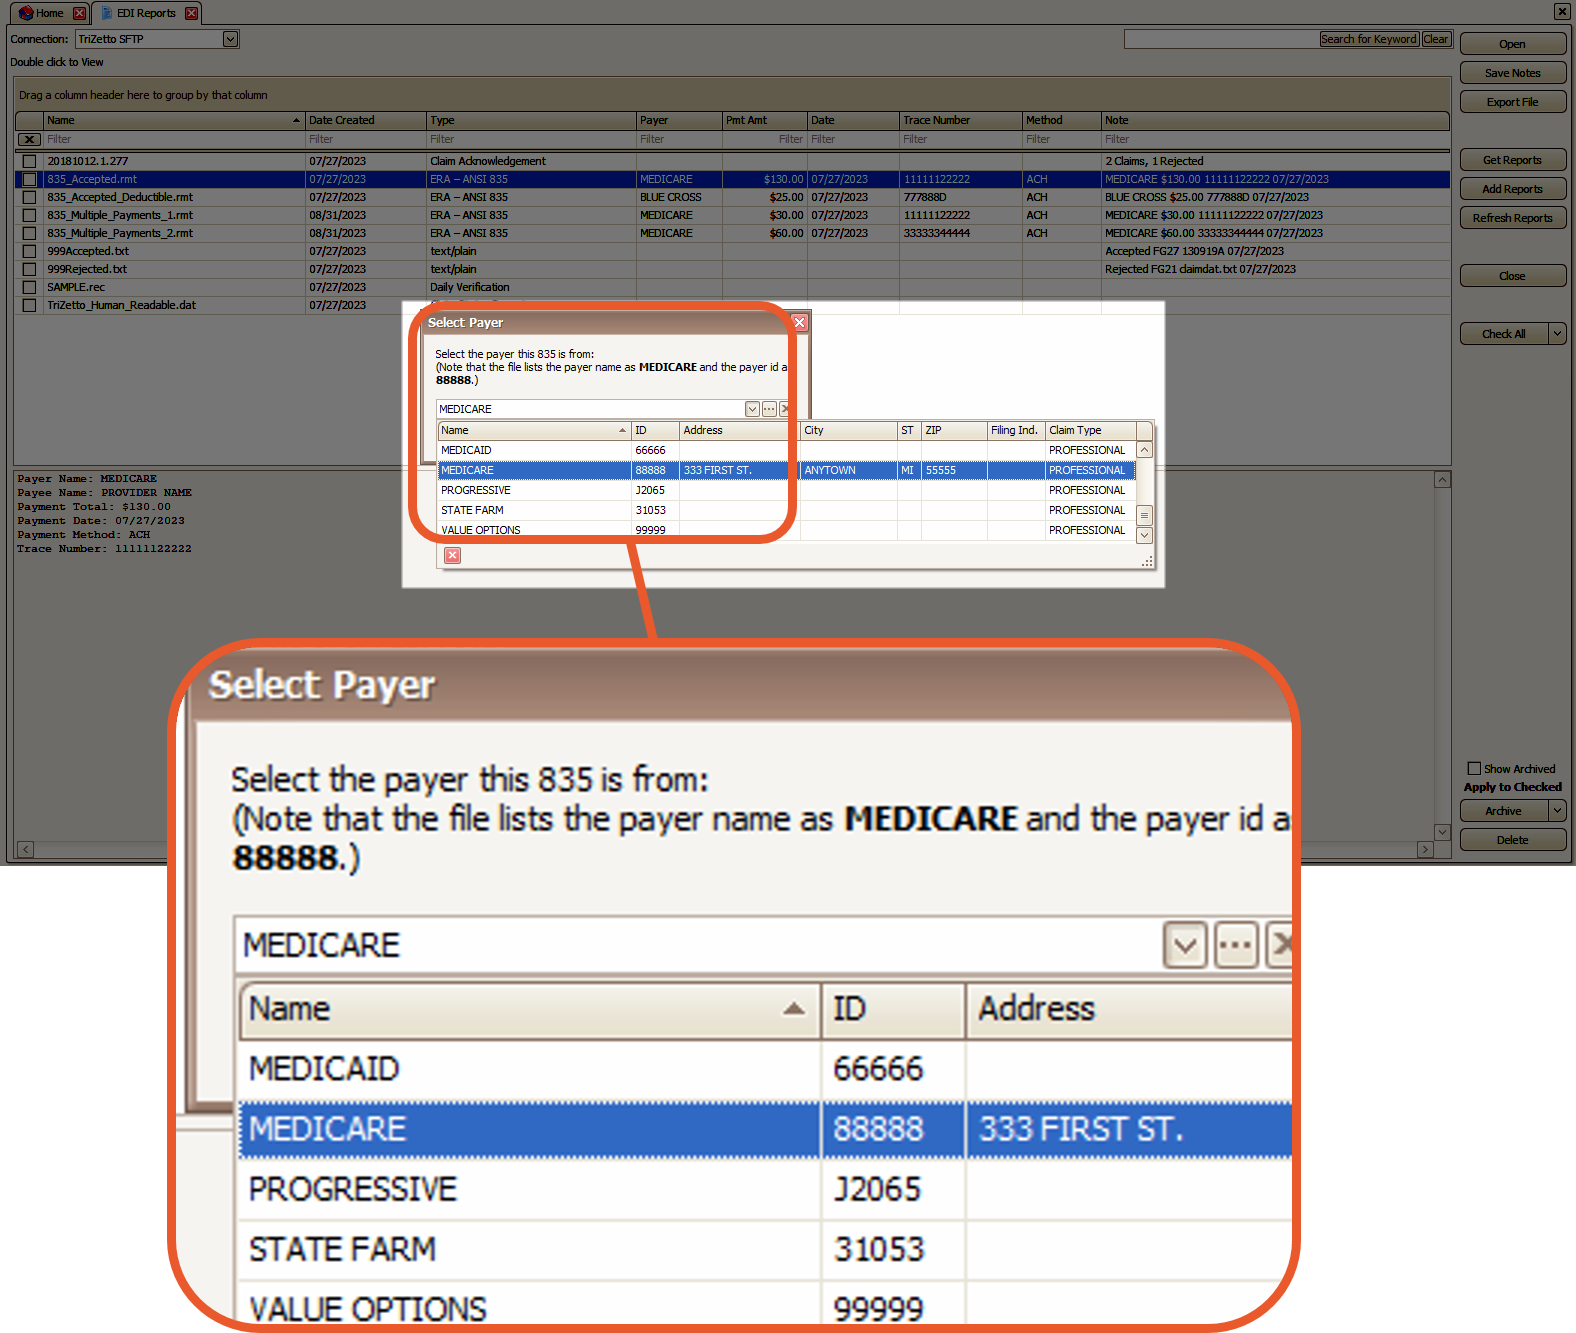
- Confirm the correct payer is selected and click OK
- Click OK to continue
If the 835 file has multiple payments, the pop-up will display the individual payment information:
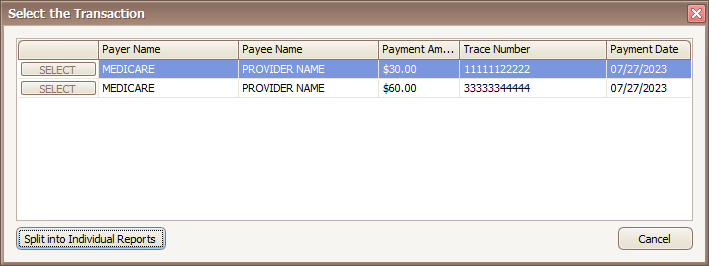
Available Options are:
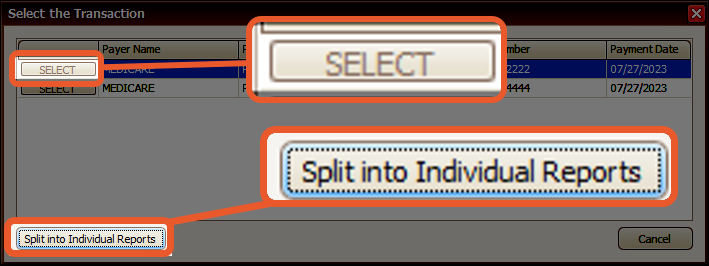
- Select – Click the Select button to process the single payment
- Split into Individual Reports – Click this button to split the 835 into individual reports making it easier to manage payments and reports.
The Auto-Posting View and Options
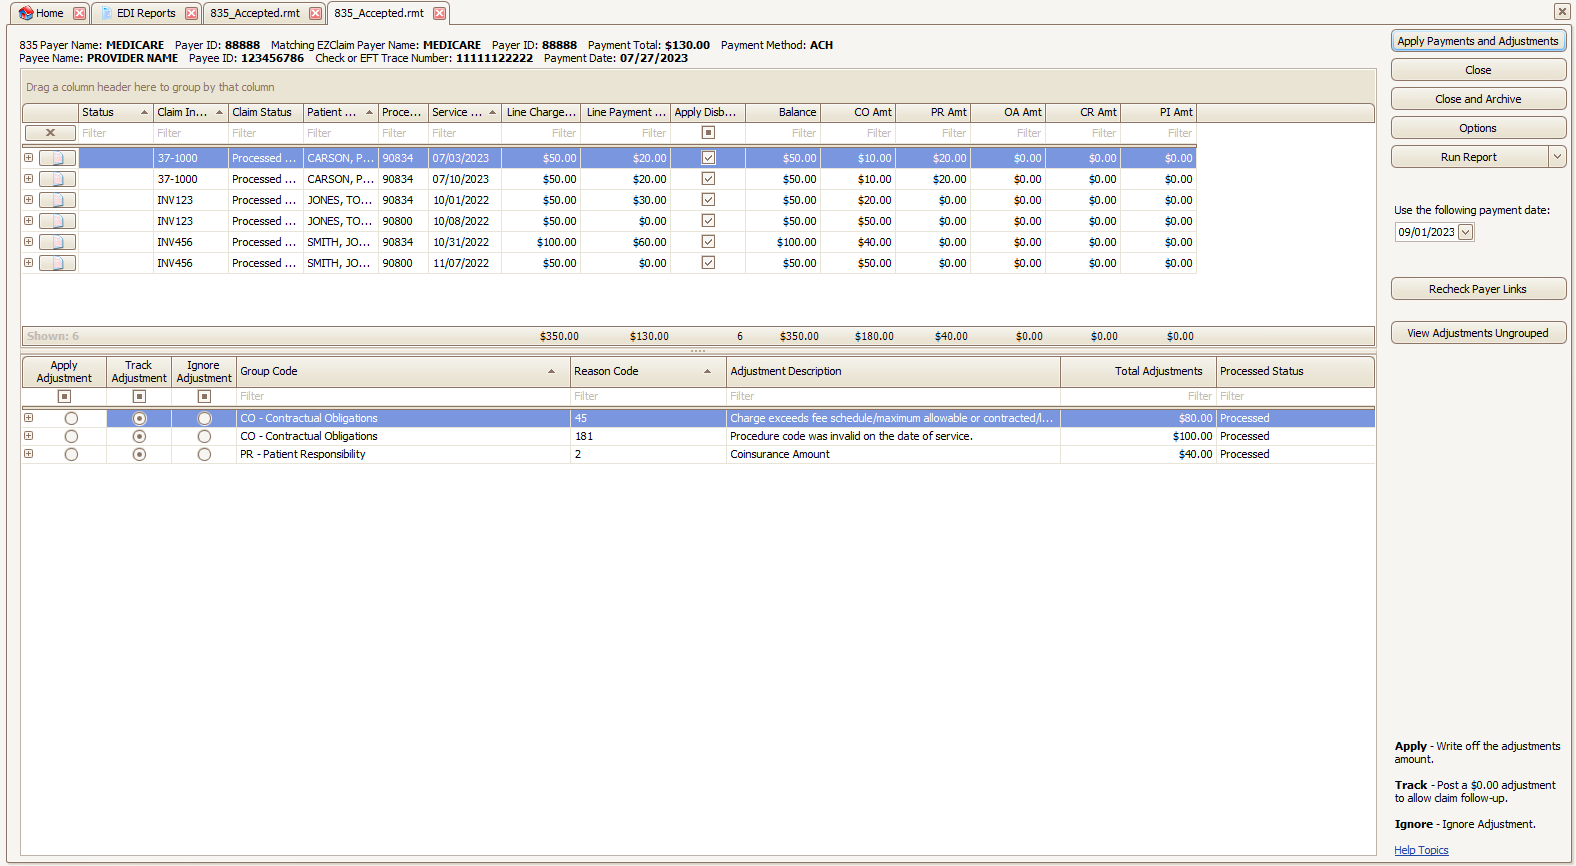
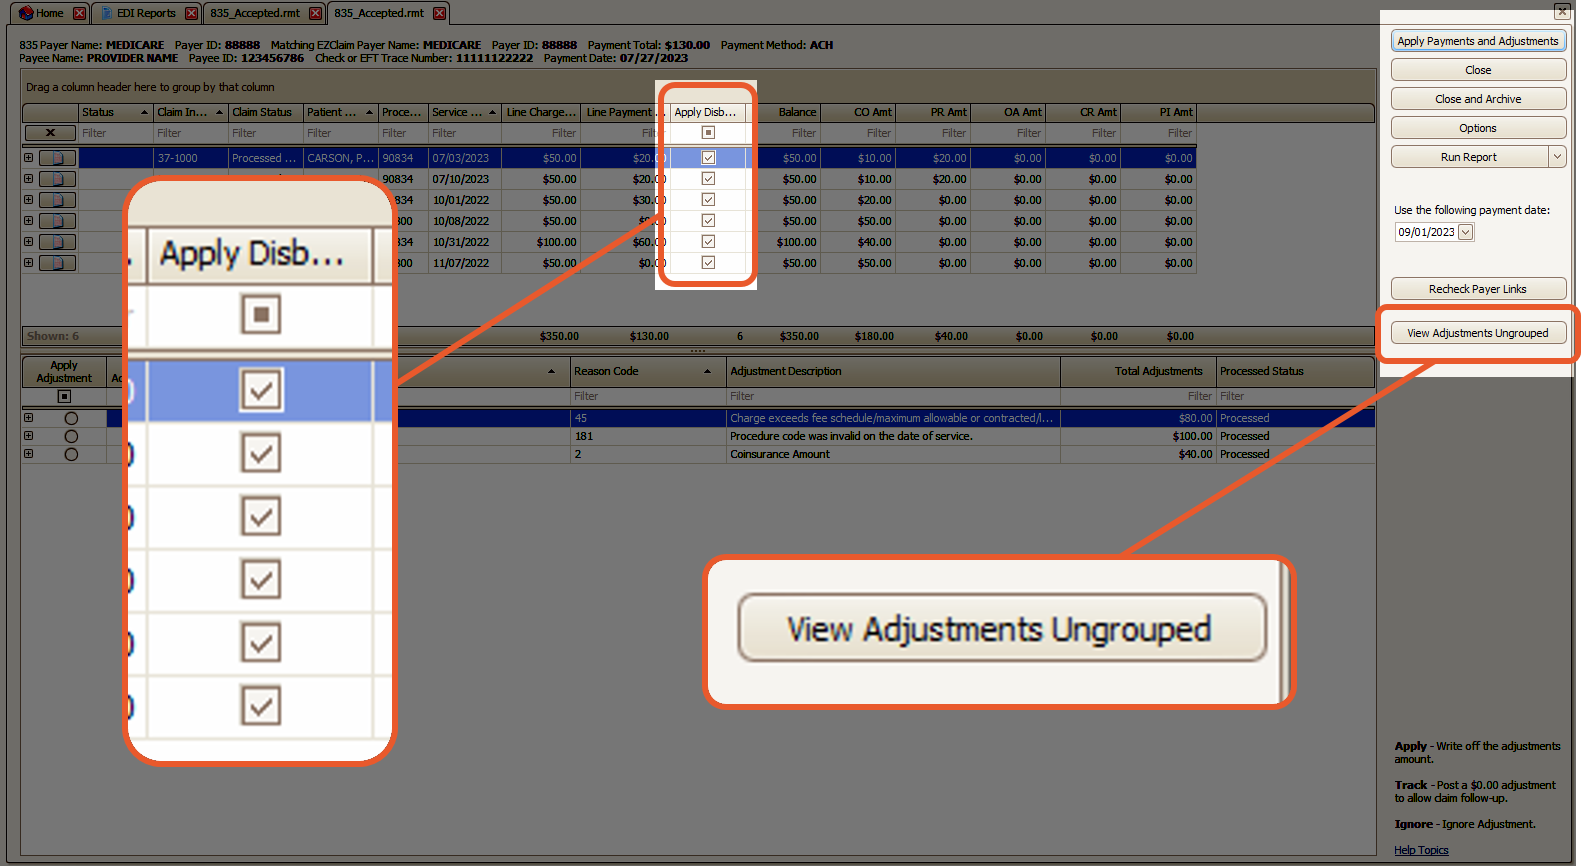
- The View Adjustments Ungrouped button provides the option to apply, track, or ignore adjustments at the service line level instead of the claim level.
- This feature is beneficial in scenarios where you need to make different choices for the same reason code.
- The Apply Disbursement grid column allows you to apply/ignore specific disbursements before proceeding to the Apply Payments and Adjustments step.
