Everything you need to know about managing Payments in EZClaim
To easily navigate this article, use the links provided below. At the end of each section, click "Back to Top" to return to this menu.
Adjustments with Payment Entry
Payment Modification / Editing an Existing Payment
Accessing the Payments Screen
Payments can be entered in multiple locations:
- To manually enter payments and adjustments, see below.
- For auto-posting ERAs (ANSI 835 files) see Auto Posting Payments.
- For paying off claims in bulk, use the Find Claim window, See Other Actions.
- For paying off a single service line or a single claim, See Other Payment Options.
Tips for Entering Payments
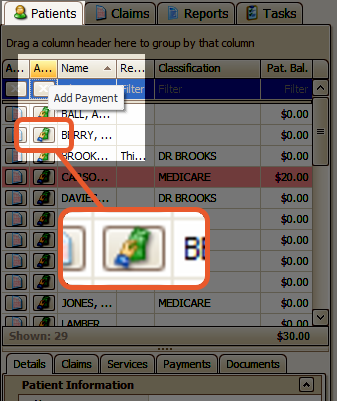
- To efficiently enter a payment for a patient, utilize the Column Chooser feature to incorporate the Add Payment button on the Patients search panel. By clicking on the Add Payment button, the Payment Entry screen will promptly appear with the patient's data already pre-selected.
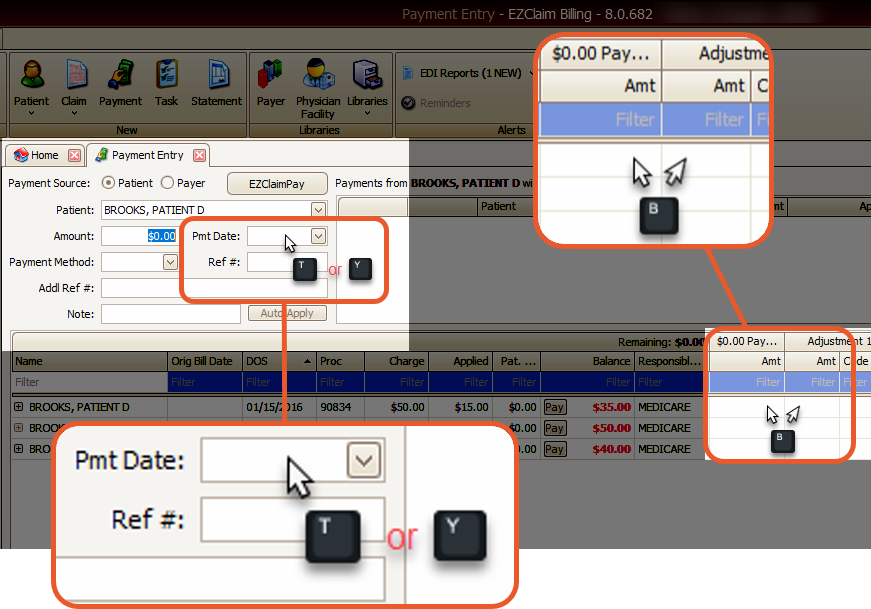
- You can expedite the process of entering a date in the payment date field by using t for today or y for yesterday.
- To expedite the process of entering the balance due in a payment or adjustment amount cell in the grid, simply press b.
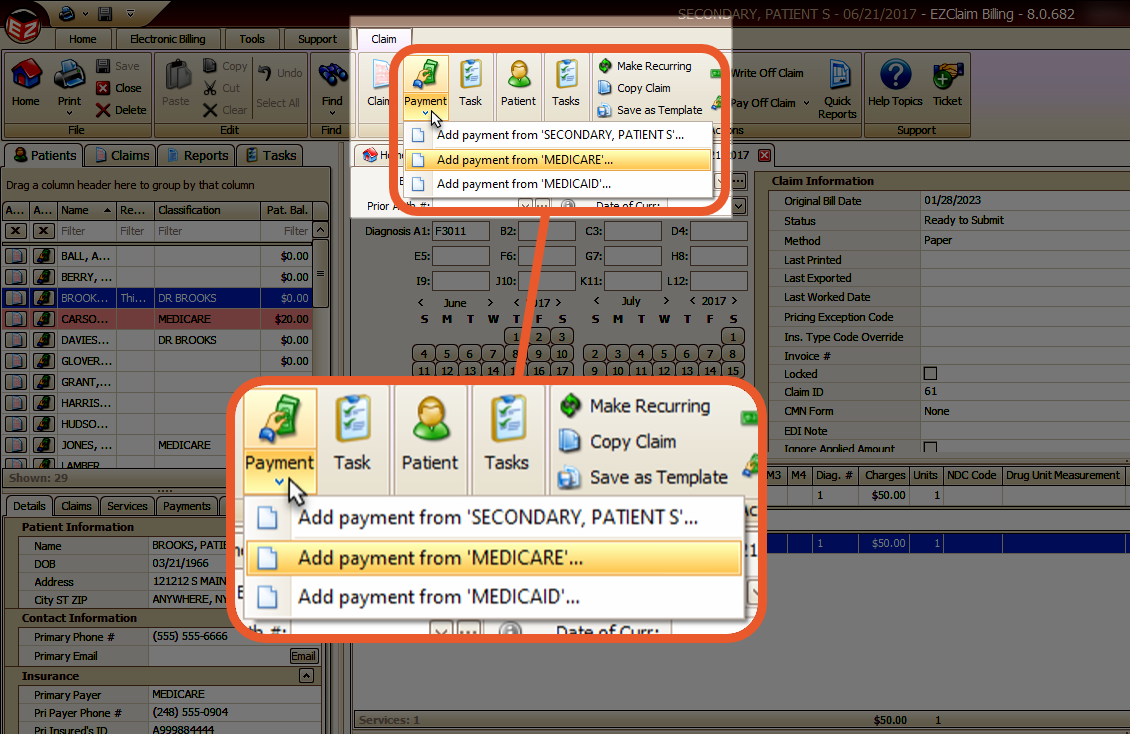
- If you find yourself on a patient's claim and require a convenient way to enter a quick payment, you can utilize the Payment button located at the top of the screen in the ribbon bar. This will allow you to efficiently enter a payment for either the patient or the payer.
Entering Payments
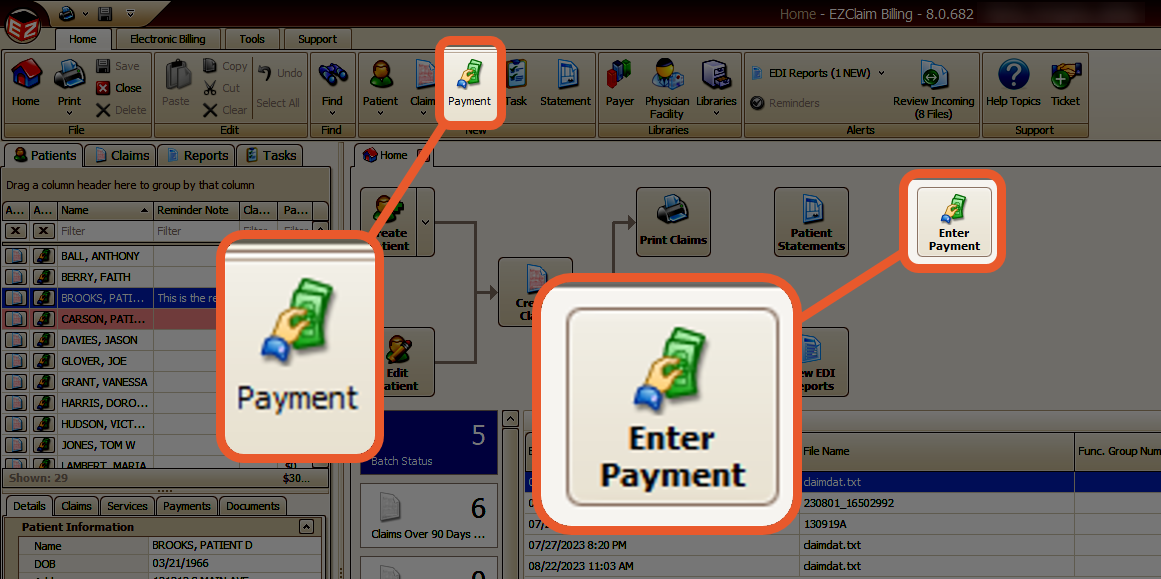
- Click the Enter Payment button on the home screen
- Select a Payment Source
- If the payment came from the Insurance company, select Payer
- If the payment came from the patient, select Patient
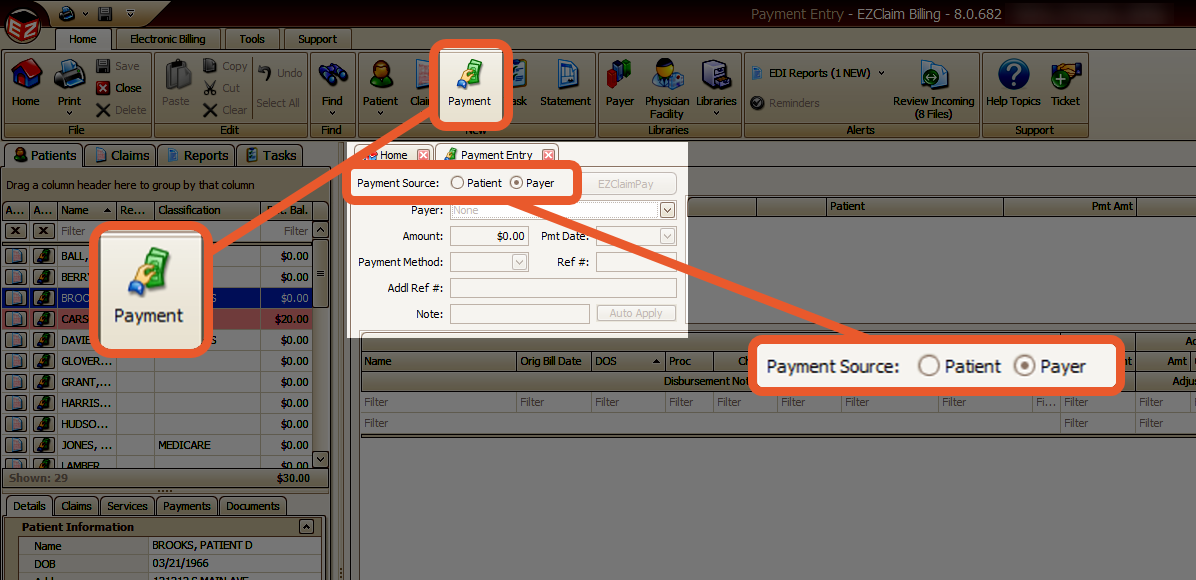
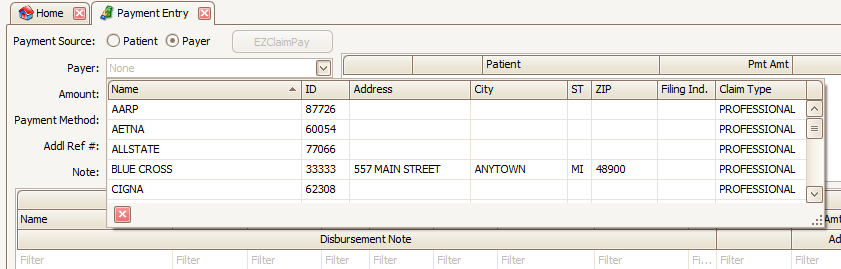
- If you choose Payer, then select the correct payer from the drop-down list.
- EZClaim will automatically load all service lines that have a balance associated with the payer or patient
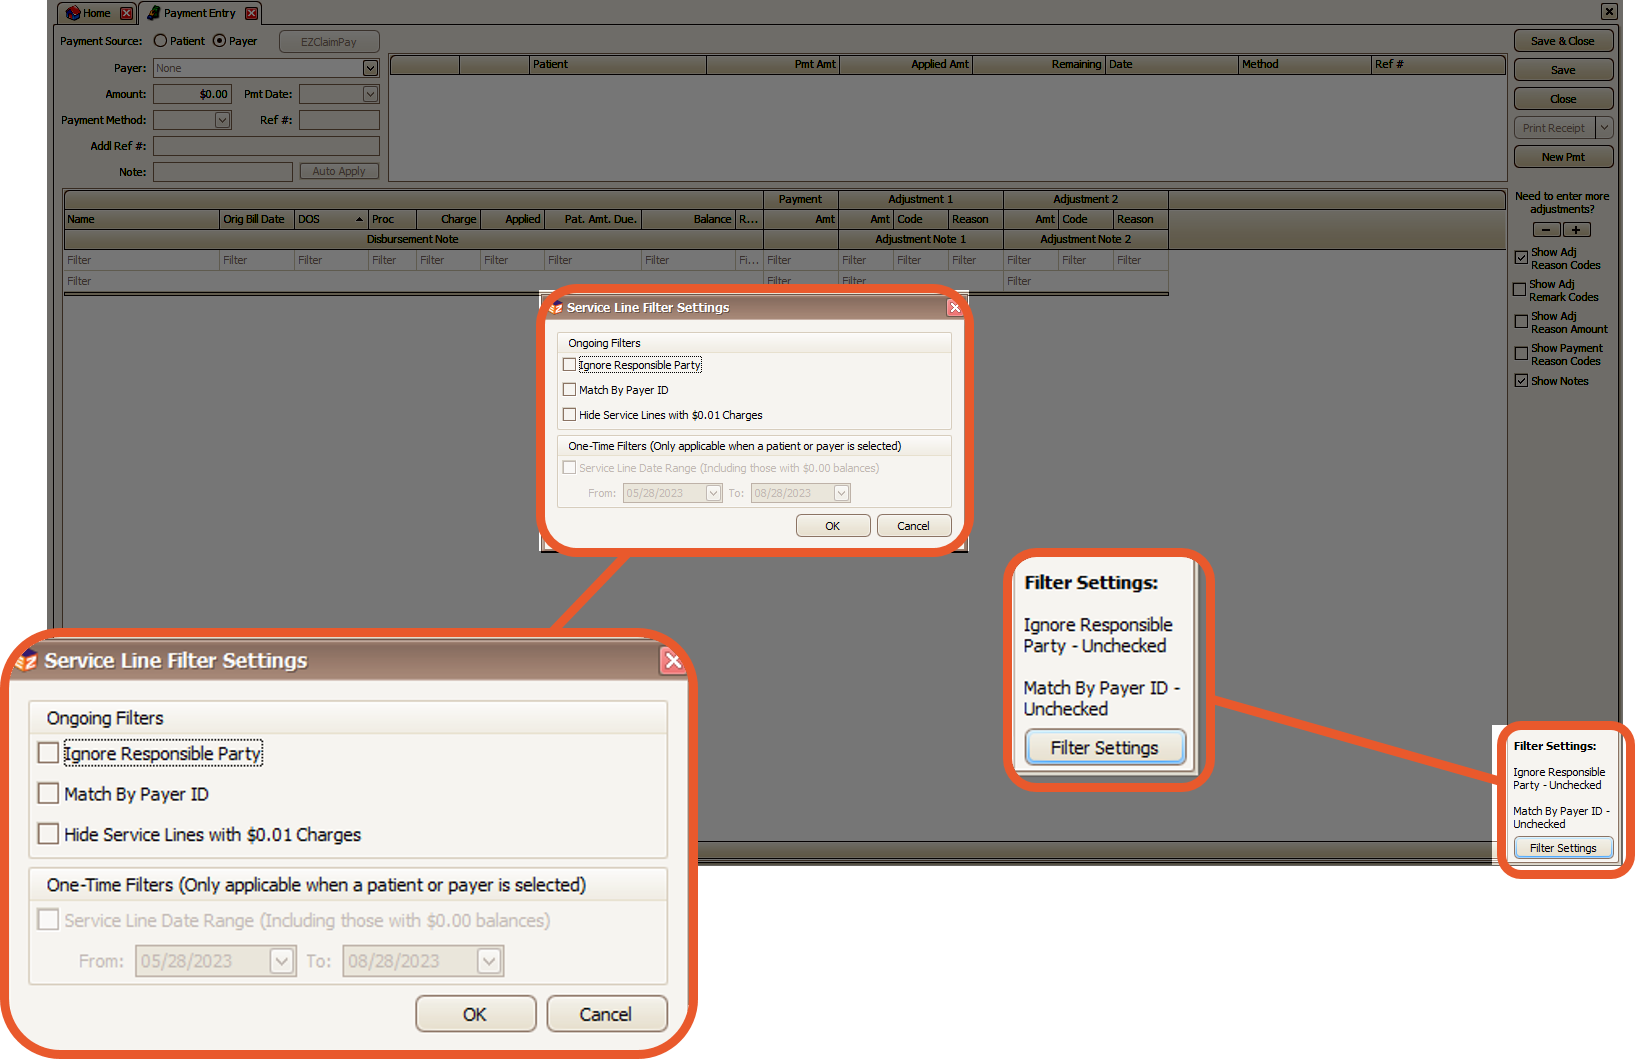
Note: If you cannot find the service lines you are expecting, it may be necessary to modify your filter settings. By default, service lines with a balance of $0.00 are not displayed in the grid, but you can add them through the filter settings.
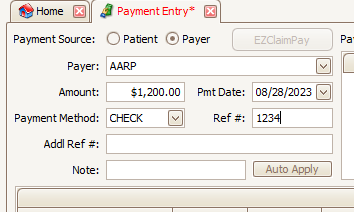
- Enter the payment details such as check amount, date, method, and reference information.
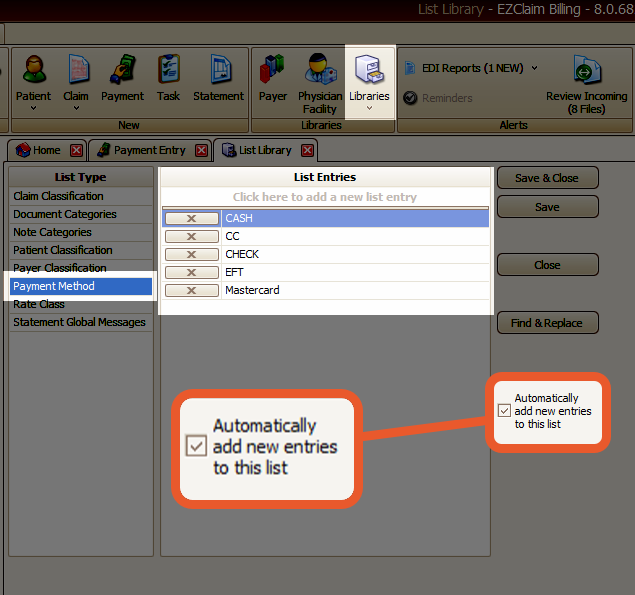
Tip: To efficiently manage payment methods, you can add or update them in bulk using the List Library. Simply navigate to Home > Libraries > List > Payment Method. Any new entries made in the Enter Payment window will be automatically saved unless the corresponding box is unchecked.
- In the apply payment grid, you can enter the dollar amount that you want to apply to the service lines.
- Additionally, you have the option to enter adjustment amounts if needed.
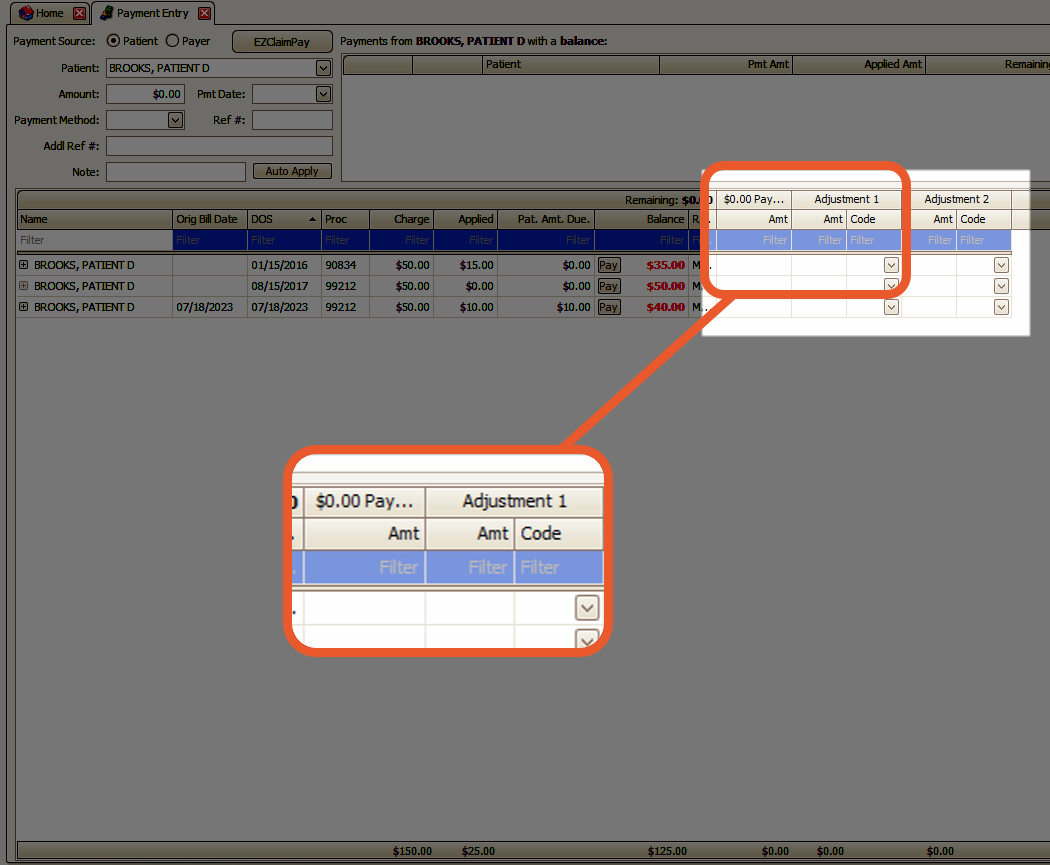
- Once the remaining balance reaches $0.00, it indicates that the full payment amount has been successfully applied
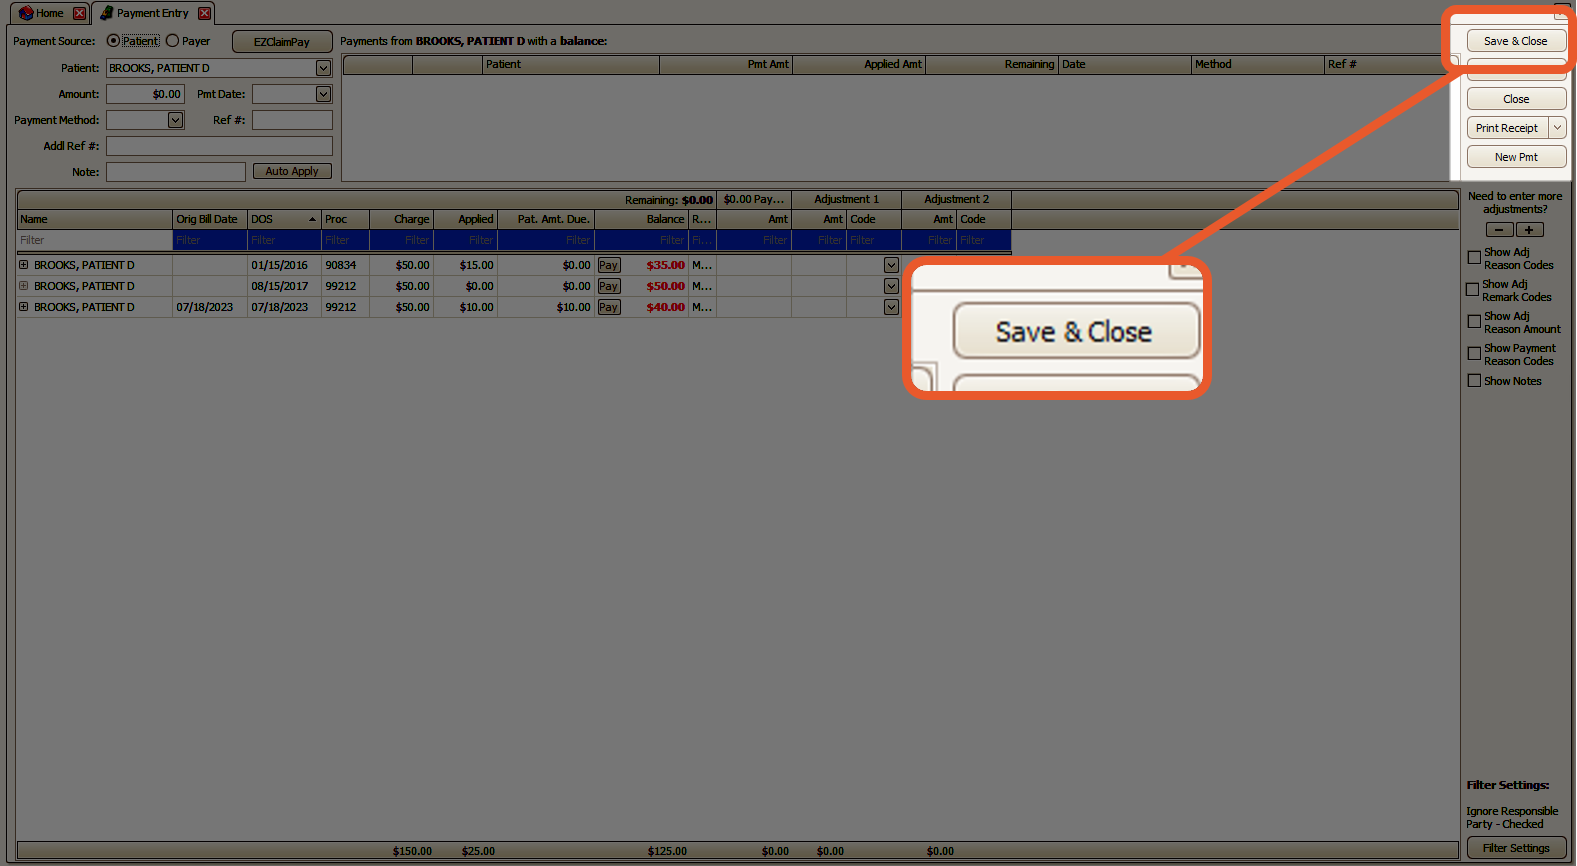
- Save and Close the payment when finished
Adjustments with Payment Entry
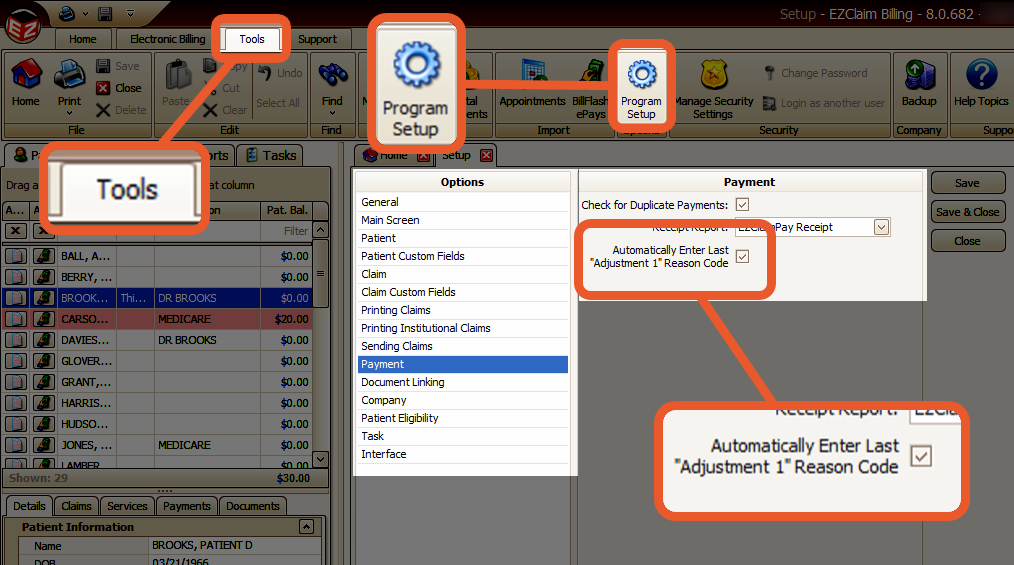
Adjustments can be conveniently entered simultaneously with payment information. EZClaim will automatically remember the group code and reason code for the Adjustment 1 column.
This feature proves beneficial for data entry as a contract adjustment is typically included with every payment. If you wish to disable this feature, you can modify the options in the Payment Options section of the Program Setup.
Note: This process requires the Admin Password
Payment Modification
On the Payment Modification screen, you have the ability to make various changes:
- Edit the payment details, including the amount, date, references, and note information.
- Adjust the amount applied (disbursed) to a service line.
- Remove a disbursement from a service line.
Note: You cannot apply payments to additional service lines on this screen. This action must be done from the Payment Entry screen.

Access the Payment Modification Screen
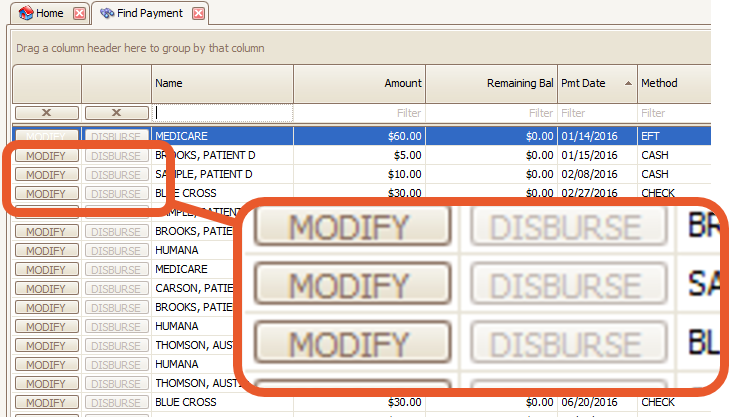
To open the Payment Modification window for a payment, you may use the Find Payment window (or any other grid that shows payments).
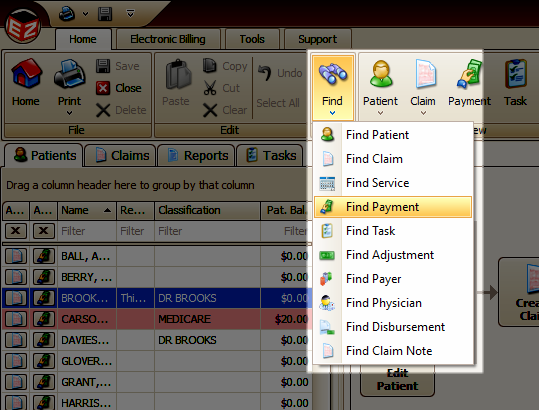
Click the MODIFY button to edit the payment, or DISBURSE to disburse the payment.
Note: If the Enter Payment window opens instead of the Payment Modification window, you can also right-click the payment and select Modify Payment
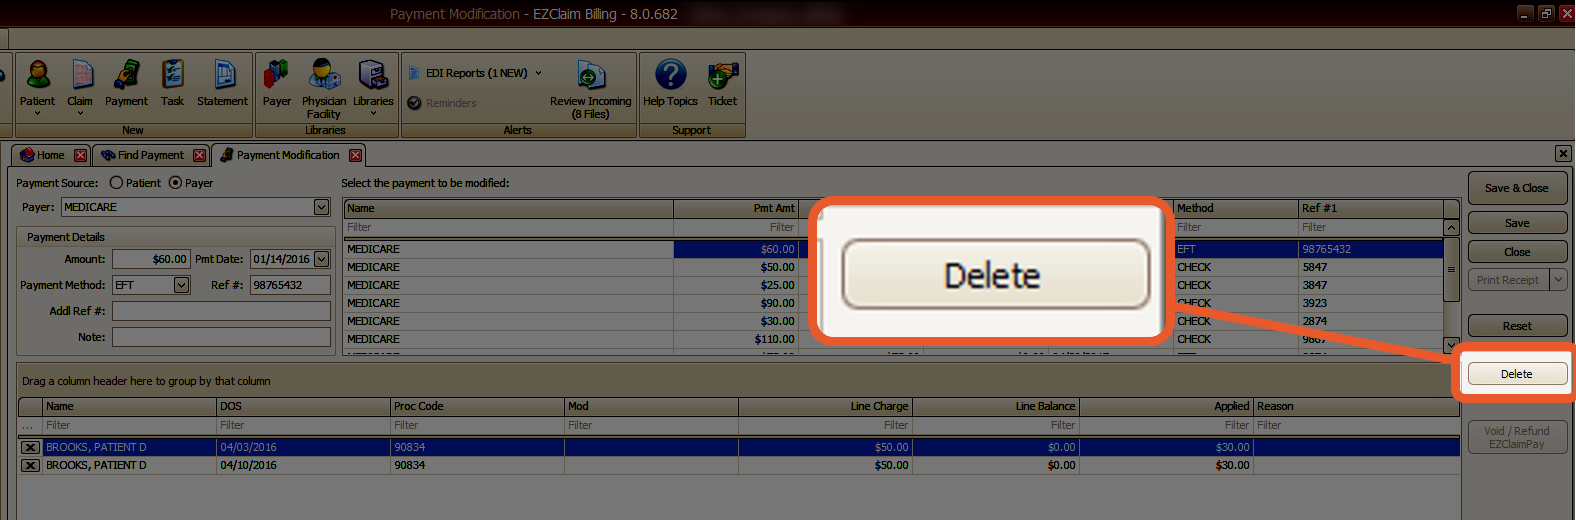
Delete a Payment
To delete a payment, utilize the Find Payment window to locate the payment. You can access the Payment Modification screen by clicking MODIFY. Once you have opened the payment, simply click the Delete button.
Warning: It is important to note that deleting a payment will result in the automatic deletion of all associated disbursements.
Checking for Duplicate Payments
When the dollar amount and reference number are entered, EZClaim will automatically check for any duplicate payments. If a duplicate is found, a message will appear displaying the details of the existing payment.
Note: EZClaim only considers the dollar amount and reference number when checking for duplicates
