The Payer Library is used to maintain Payer information and customize Payer options
To easily navigate this article, use the links provided below. At the end of each section, click "Back to Top" to return to this menu.
Merging and Deleting Payer Library Entries
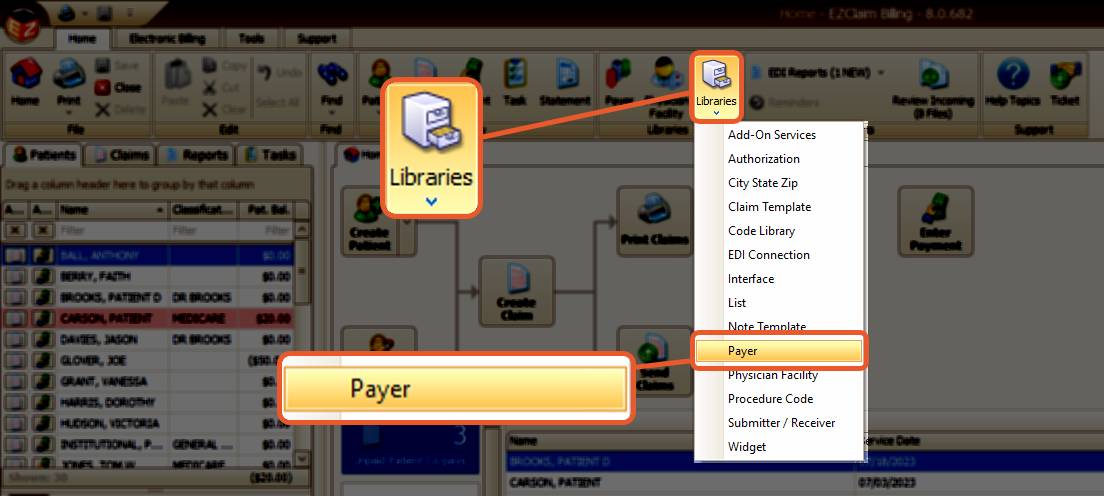
Access the Payer Library
- Click the Libraries icon located in the ribbon bar
- Select Payer
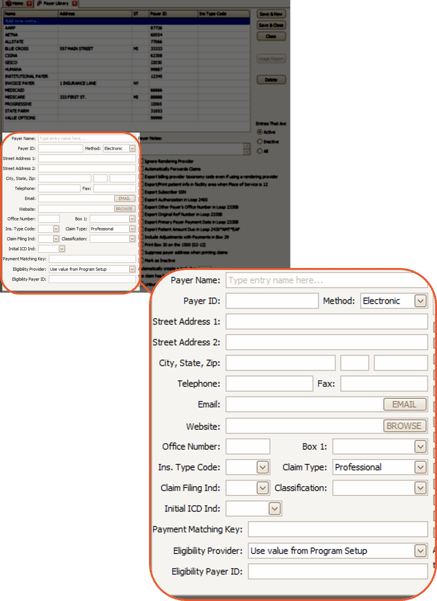
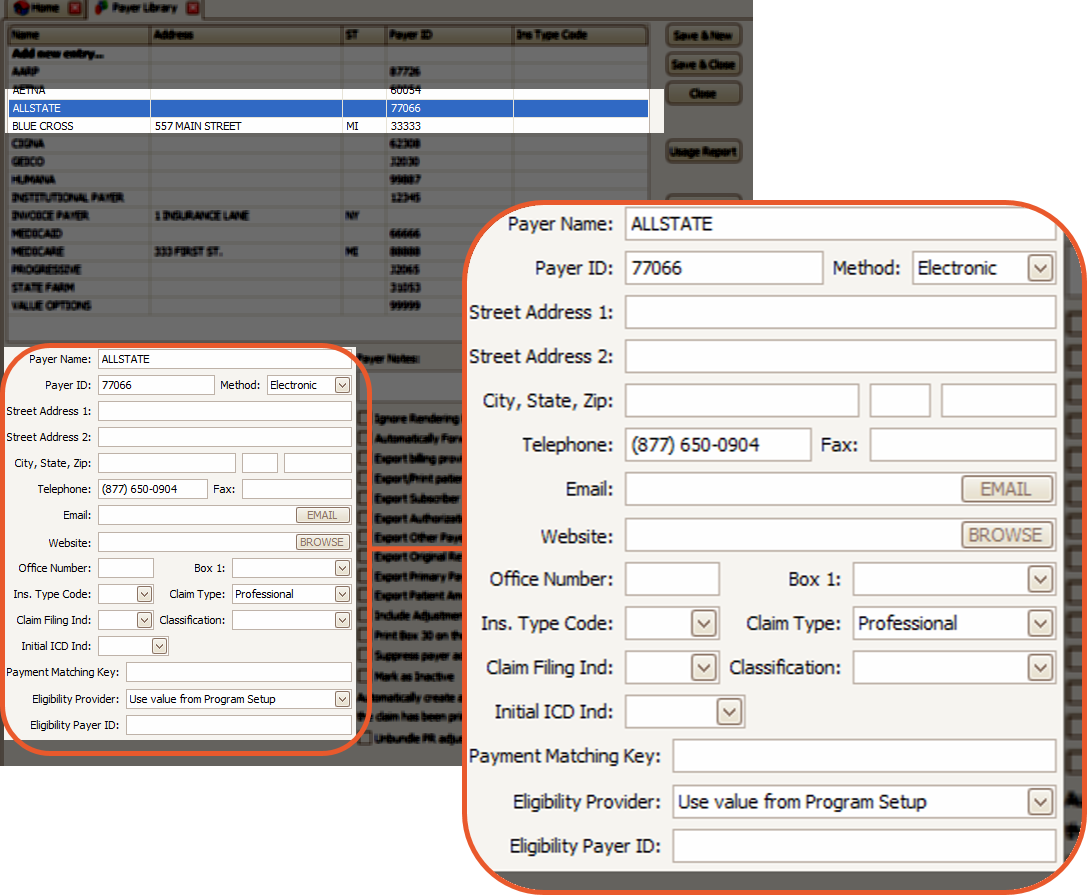
Payer Library Fields
- Payer Name and Address information
- Payer ID – The Payer ID is a code provided by the payer or clearinghouse to identify this payer. It is especially important for electronic billing and when there are multiple entries for the same payer with different mailing addresses.
- The Payer ID enables smooth payment posting by linking multiple payer library entries together. In these situations, the Payment Matching Key can also be useful
- For more information, review the Payment Matching Key section below
- The Payer ID enables smooth payment posting by linking multiple payer library entries together. In these situations, the Payment Matching Key can also be useful
- Method – Select the method of transmission, Paper or Electronic
- Ins. Type Code - The Ins. Type Code is utilized when submitting electronic claims for Medicare Secondary Payer. If you need to override the value in the payer library, you can use the Insurance Type Code Override field on the claim grid.
- This eliminates the necessity of having duplicate payer library entries solely for the purpose of a different insurance type code
- Claim Filing Indicator – A code identifying the source or type of payment for the claim
- Classification – For reporting and grouping purposes, it is often more convenient to use a classification instead of the payer name.
- For instance, if you have multiple Blue Cross entries created for different billing scenarios, setting the Classification to BCBS would facilitate running reports on all the Blue Cross entries without the need to select each entry individually.
Note: The payer classification criteria are only applicable to specific reports
- Initial ICD Ind – This feature is utilized to set the ICD indicator on new claims associated with this payer. The setting overrides the ICD indicator setting in Program Setup.
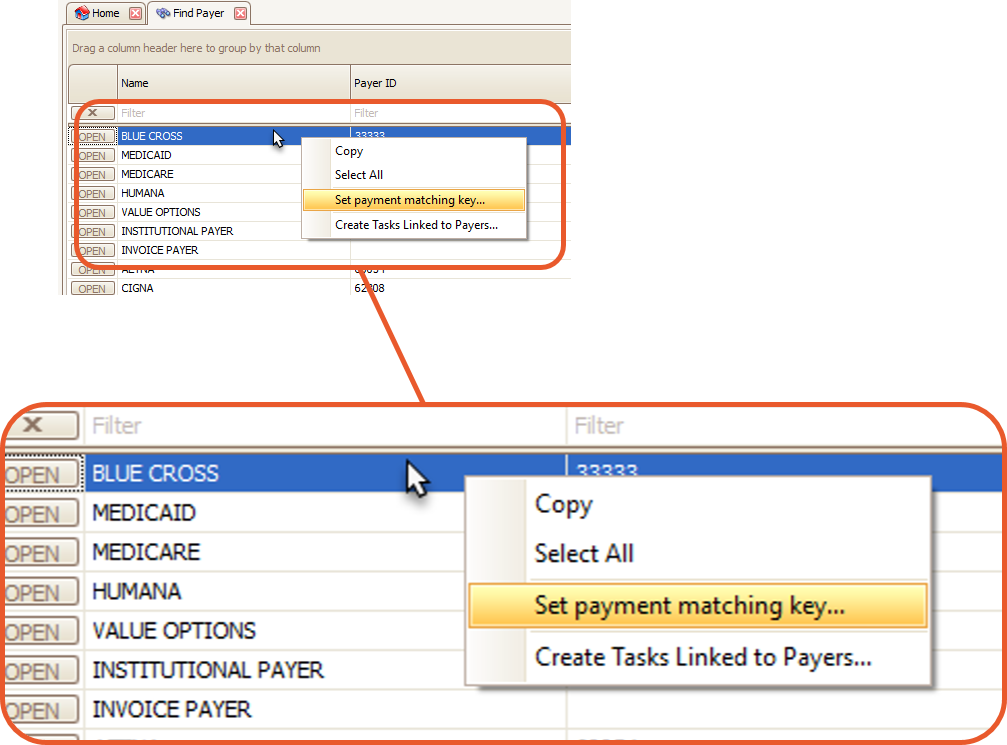
- Payment Matching Key - This feature allows users to group multiple payers together for payment posting purposes.
- For example, if a user enters Blue for each of their Blue Cross, Blue Shield, etc., all payers with Blue in that field will be treated as if they were the same payer for automatic payment posting.
Tip: The Payment Matching Key can be updated in bulk at the Find Payer window by right-clicking the payers that need to be edited
- Eligibility Payer ID – This feature is utilized in cases where the Payer ID for eligibility verification differs from the payer ID for claims submission
Payer Library Options
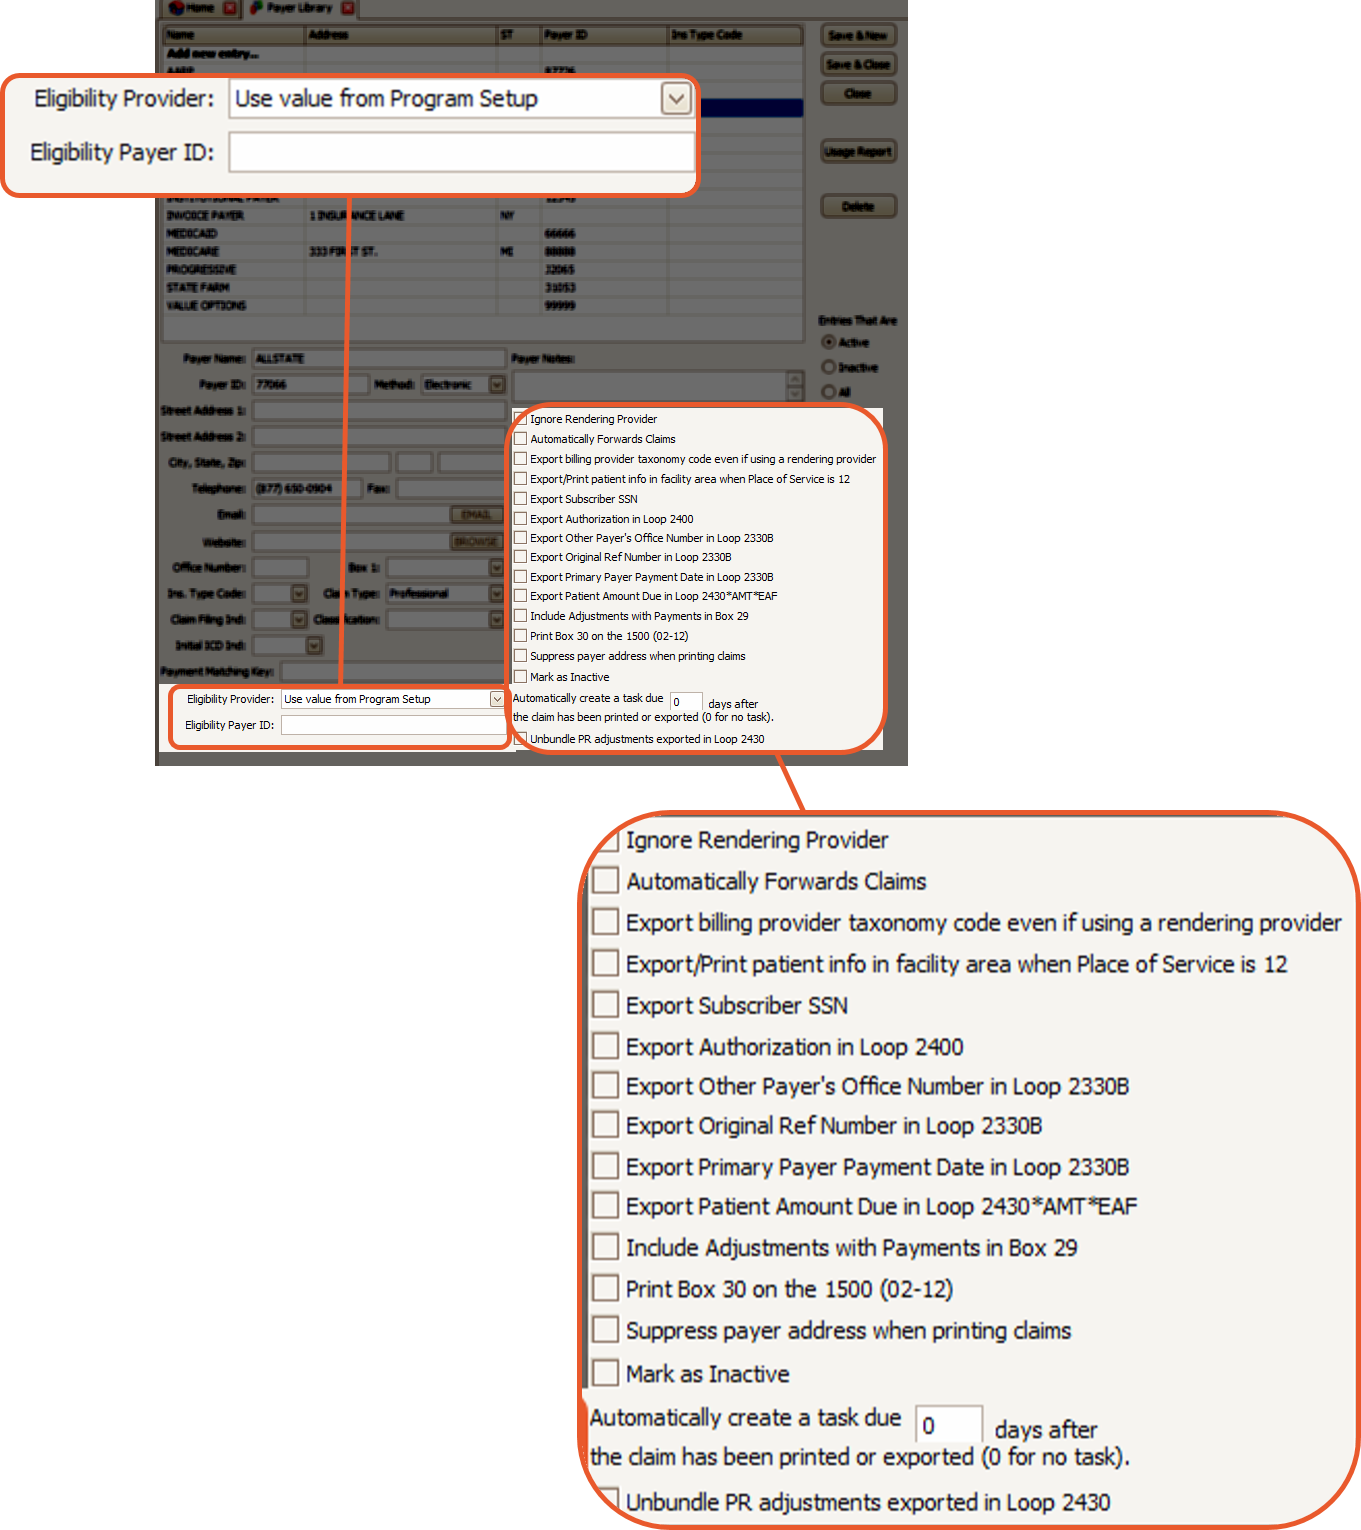
- Ignore Rendering Provider – Ignores the Rendering Provider information when a claim is printed or exported
- Automatically Forwards Claims – Certain payers, particularly Medicare, have the capability to forward claims to secondary and/or tertiary payers. When Automatically Forwards Claims is selected, claims that transition from primary to secondary will be automatically marked as Submitted.
- This means that they will not be printed or exported by the user since they have already been forwarded.
Note: It is important to note that the Claim Status reported in the 835 files will determine whether the secondary or tertiary claim is set to Ready to Submit or Submitted.
For example, if the 835 indicates that the claim was Processed as Primary and forwarded to Additional Payer(s), the status of the secondary claim will be set to Submitted. On the other hand, if the 835 states that the claim was Processed as Primary, the status of the secondary claim will be set to Ready to Submit.
- Export billing provider taxonomy code even if using a rendering provider – Select this option to export the billing provider taxonomy in Loop 2000A Segment PRV Field 02, even if a rendering provider is chosen for a claim.
- Export/Print patient info in Facility loop when Place of service is 12 – Most commonly utilized by Home Health providers
- Export Subscriber SSN – Select this option if the payer mandates the inclusion of the subscribers Social Security Number (SSN) in the ANSI 837 file. The SSN should be entered in the Subscriber SSN field on the Primary or Secondary Insurance tab.
- Export Authorization in Loop 2400 – Select this option to export the authorization in loop 2400 rather than the standard loop 2300
- Export Original Ref Number in Loop 2330B – Select this option to export the original reference number in loop 2330B
- Export Primary Payer Payment Date in Loop 2330B – Select this option if the payer mandates the inclusion of this information on secondary claims
- Export Patient Amount Due in Loop 2430*AMT*EAF – Select this option if the payer mandates the inclusion of this information on secondary claims
- Include Adjustments with Payments in Box 29 – When selected, the amount displayed in Box 29 will incorporate any adjustments made
- Print Box 30 on the 1500 (02-12) – Select this option to print the balance due in box 30 for the 02-12 version of the 1500 form.
- Typically, this box is left blank.
- Suppress payer address when printing claims – Select this option to suppress the printing of the payer address at the top of the 1500 form
- Mark as Inactive – Select this option to hide the Payer from being displayed in the Payer List
- Automatically create a reminder task – This feature allows EZClaim to automatically generate a task with a specified due date for a certain number of days after the claim has been billed.
- Once a claim has been printed or exported, a task will be created with a due date set for the designated number of days after the claim has been billed.
- Eligibility Provider – Utilize this field if there is a need to override the provider that has been selected under the Program Setup option
- Eligibility Payer ID – If the eligibility payer ID differs from the one used for claim submission, you can utilize this option
Setting Up the Payer Library
Warning: Payer Library data must be entered before entering Physician Library data
- Enter the Payer Name and Payer Address information in the designated fields
- Enter the Payer ID when submitting claims electronically
- Confirm the correct Payer ID by checking the payer list from your clearinghouse or contacting the Payer directly
- Valid payer IDs are essential for directing claims to the appropriate electronic mailbox/destination
- Select Method, Electronic or Paper
- Enter the Ins Type Code only for Medicare Secondary Claims
- Use the Insurance Type Code Override field on the claim grid to override the default Ins Type Code if needed
- Select Claim Filing Indicator if submitting electronic claims
- The Claim Type field is visible and available for clients who submit both Professional and Institutional claims
- To activate the Institutional claim type, an activation code must be entered under Libraries > Add-On Services
- Please contact EZClaim to obtain the necessary activation code
- To group multiple payers together for payment posting, use the Payment Matching Key field
- For example, if you enter BLUE for different Blue Cross Blue Shield entities, all Payer Library entries labeled as BLUE will be treated as the same payer for automatic payment posting
- To update the Payment Matching Key in bulk, right-click the payers you want to edit at the Find Payer window
- All other fields are Optional
- After ensuring that the payer information is accurate and complete, click on one of the Save buttons
Edit Payer Information
To edit payer information after it has been entered
- Select the payer
- Make the necessary edits
- Click on one of the Save buttons.
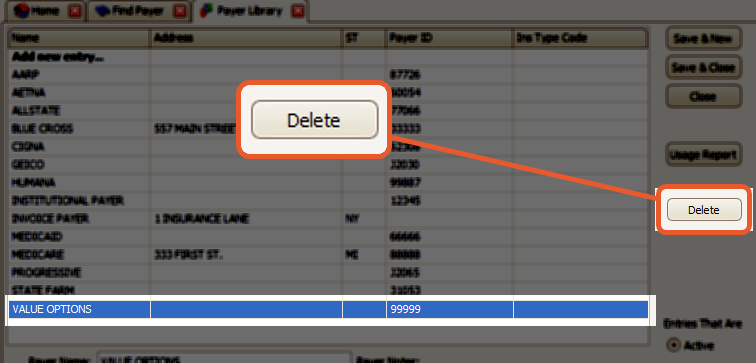
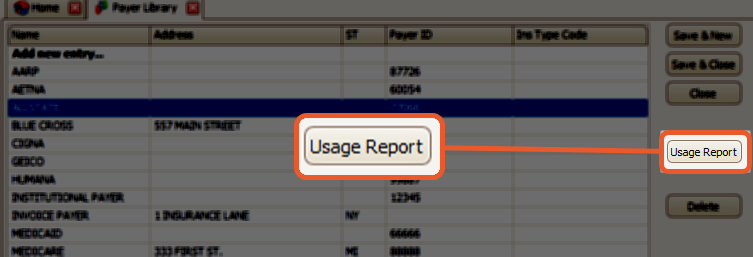
Merging and Deleting Payer Library Entries
Note: EZClaim does not permit the deletion of Payer Library entries that are currently in use
To view a detailed list of patients and claims, click on the Usage Report button in the Payer Library screen
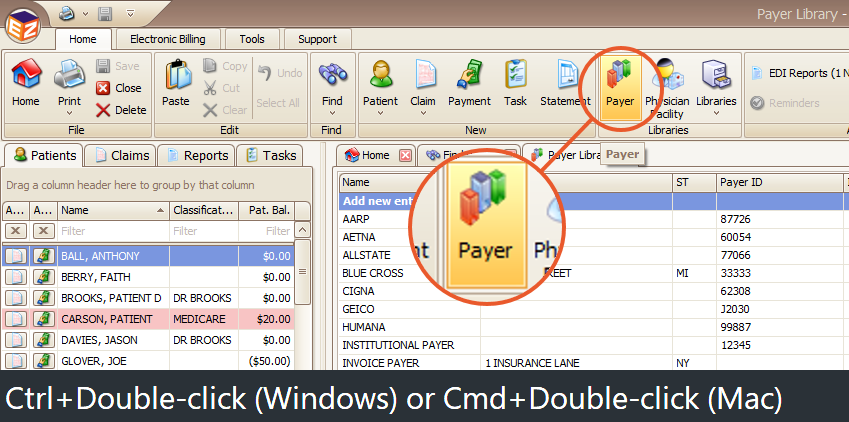
To conveniently update payer information, you can use the Find and Replace for Payer Library feature.
- To Access this feature use Ctrl+Double-click (Windows) or Cmd+Double-click (Mac) on the Payer icon located in the ribbon bar.
Note: You will need to enter the ADMIN password
- Select one of the outdated entries in the Find Payer drop-down
- Choose the preferred entry in the replace with drop-down

Once the outdated entry is no longer associated with any patients or claims, you will be able to delete it from the EZClaim Payer Library.
- Highlight the Payer you would like to delete
- Click the Delete button