How to access the Code Library and set up Codes
To easily navigate this article, use the links provided below. At the end of each section, click "Back to Top" to return to this menu.
Accessing the Code Library
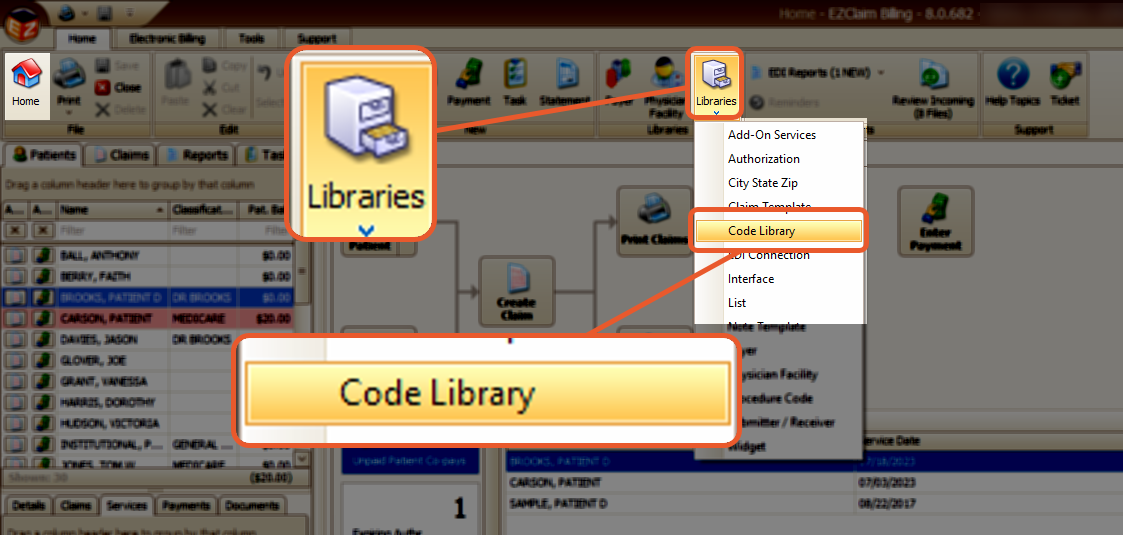
To access your Code Library in EZClaim, simply click on the Libraries button found in the ribbon bar, and then choose Code Library.
The Code Library is used to maintain the following code sets:
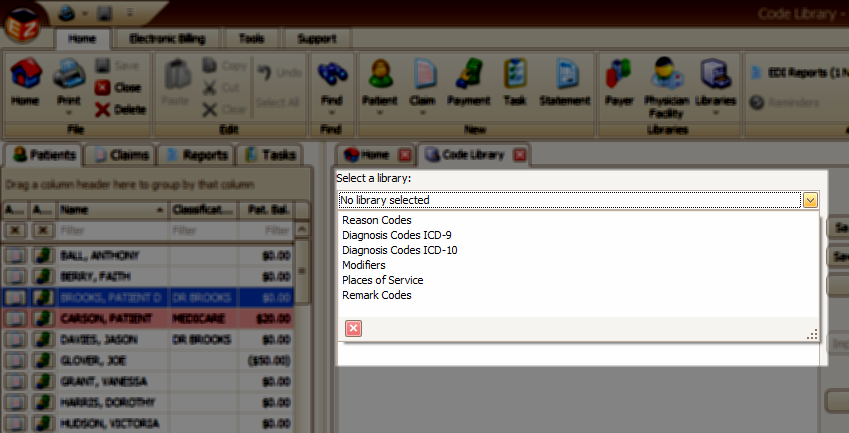
Code Sets
Reason Codes (Adjustment reason codes) - The reason codes will be automatically loaded by EZClaim if there are none currently in the library. Users have the ability to add, edit, or remove codes as necessary. Any field that utilizes a reason code will display a drop-down box containing the code and description.
Remark Codes – EZClaim automatically loads remark codes into the library if none exist. Users have the flexibility to add, edit, or remove codes as needed. Remark codes are utilized for auto-posting ERAs, and adjustments generated from posting 835 files will include remark codes from the files Outpatient Adjudication Information or MOA segment. To view the descriptions of remark codes, users can double-click on the code displayed on the 835 preview screen or view the Remark Codes in the Code Library.
Diagnosis Codes ICD-9 – EZClaim does not come pre-populated with diagnosis codes. Users are required to manually enter the codes as needed. To open the Diagnosis Code Lookup on the claim screen, simply double-click (or press Alt+L on Windows/Option+L on Mac) on any of the Diagnosis Code fields. If you enter a keyword into the diagnosis field before opening the lookup window, EZClaim will automatically search the code list for you.
Diagnosis Codes ICD-10 – ICD-10 diagnosis codes are not pre-populated in EZClaim. To enter the codes, simply open the claim screen and double-click (or press Alt+L for Windows/Option+L for Mac) on any of the Diagnosis Code fields to access the Diagnosis Code Lookup. If you enter a keyword into the diagnosis field before opening the lookup window, EZClaim will search the code list for you.
Place of Service – Please note that EZClaim does not come pre-populated with place of service codes. You will need to manually enter the codes as required. To access the Place of Service Lookup, simply double-click (or press Alt+L for Windows/Option+L for Mac) in the Place of Service field on the claim screen.
Modifiers – EZClaim does not come pre-populated with modifiers. Users are required to manually enter Modifier codes as needed. To access the Modifier Lookup, simply double-click on the Modifier field on the claim screen.
Importing Codes
Many of our customers find it beneficial to import existing code libraries from external sources into EZClaim.
Note: The first and most crucial step in the code import process is to ensure that the codes are available in the standard CSV format.
To ensure proper formatting, please provide your internal IT team with instructions for setting up the CSV file. It is important to note that EZClaim does not provide support for converting codes into the correct format.
To import a text file into the code libraries, it must follow a specific format:
- Column 1 should contain the code, followed by a tab, and then the description in column 2. For example:
- Code1{TAB}Description1
- Code2{TAB}Description2