Submitting a Batch of Claims
How to submit a batch of Claims depending on your connection type.
The steps to create and submit a batch may vary depending on the Connection type you choose.
Certain Connection types will require you to save the file to your computer, while others will automatically generate the file for you.
The text displayed on the Create Batch button will differ based on the Connection type chosen, and it will remain inactive until you have selected your Connection type.
Important: Some Clearinghouses and/or Payers have specific naming conventions. Be sure to check with your payer for any special requirements.
Files that are named incorrectly will not be able to be processed by the receiver.
Create Batch Using 'Just Export File' Connection Type
- Choose the desired Connection type, such as Just Export File

- Choose the name of the Submitter/Receiver from the drop-down menu

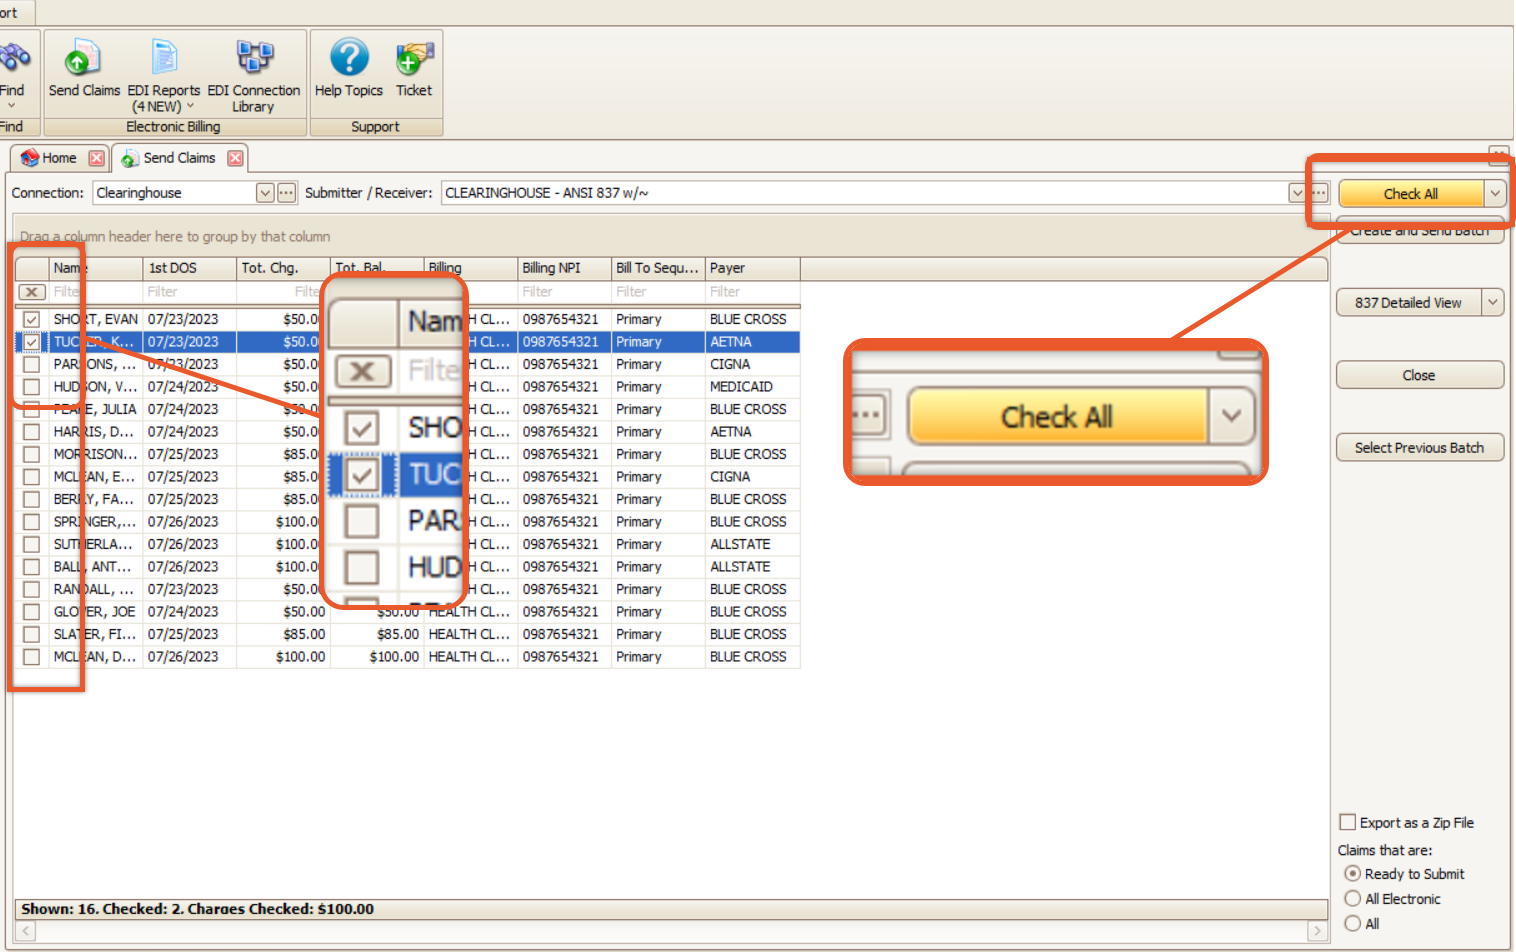
- To choose individual claims, use the checkboxes or click Check All to choose all claims

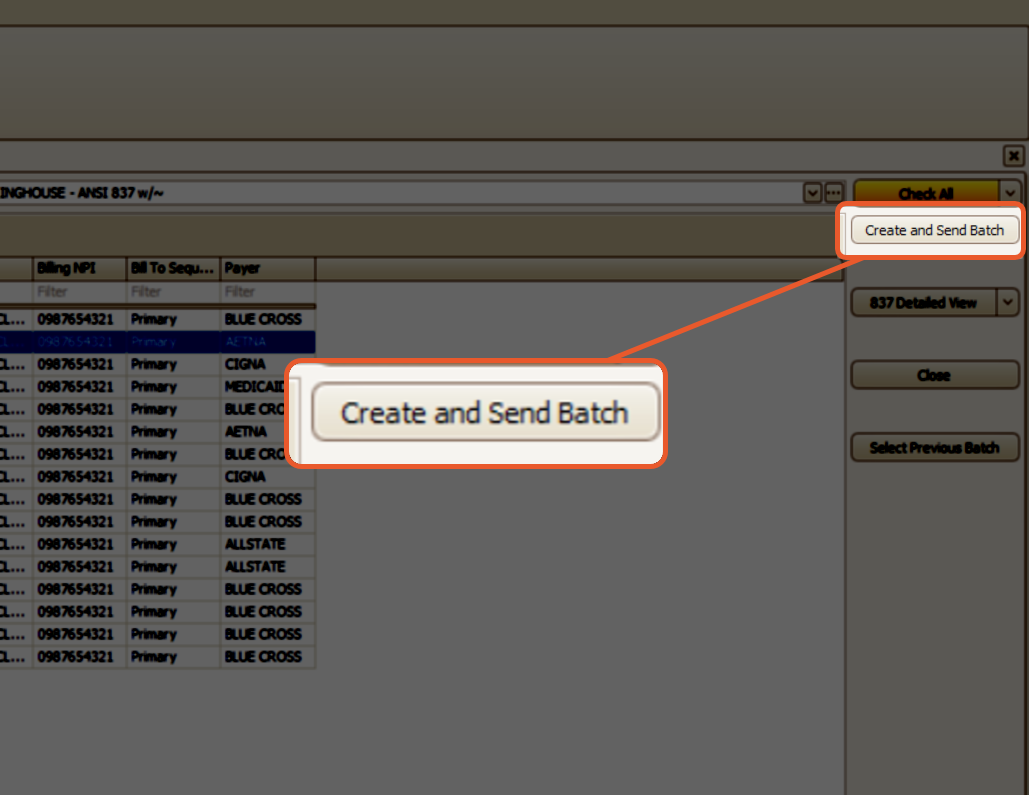
- Click on the Create and Send Batch button
💡Remember: The text displayed on the Create Batch button will differ based on the Connection type!

- Enter a filename in the Save As box and click Save
Note: It is important to make sure that the filename adheres to any specific naming guidelines provided by your Clearinghouse or Payer.
- Once the claims are exported a confirmation will appear

- Select Yes to preview (and/or print) an exported claims report

