Using the new BillFlash Powered by EZClaimPay
To easily navigate this article, use the links provided below. At the end of each section, click "Back to Top" to return to this menu.
How to Set Up the Add-On Service in EZClaim
How to access the OfficePay Log
As of Premier Release 689, EZClaim connects to Billflash using their most current API.
Prior versions connect using Billflash's legacy API.
How it Works
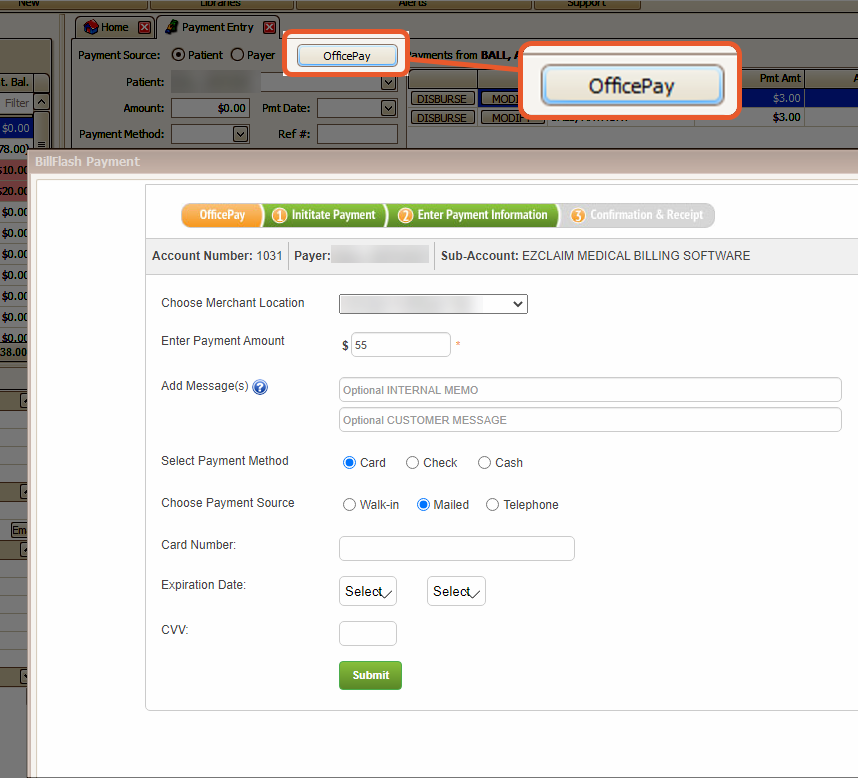
When you click on OfficePay in the Payment Entry screen, a separate browser window will open and display Billflash's website.
This is where you will need to enter your payment details.
How to Set Up the Add-On Service in EZClaim
To set up the Add-On Service in EZClaim:
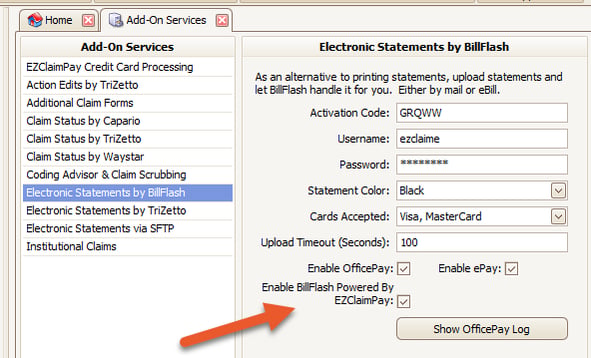
- Navigate to the Add-On Services section and select Electronic Statements by Billflash
- Fill in all the required fields and ensure that the checkbox for Enable BillFlash Powered By EZClaimPay is selected.
- By checking this box, you will be able to access MerchantTrack.
Note: Do not activate EZClaimPay Credit Card Processing.
Payment Processing
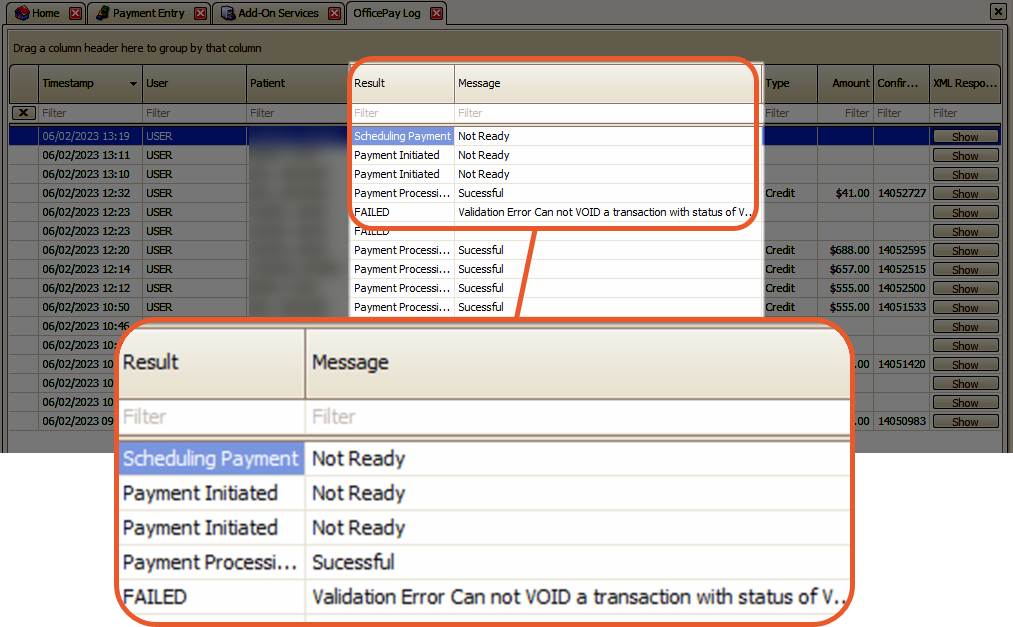
When a transaction is initiated (i.e., when the OfficePay button is clicked), it is placed in a queue, and EZClaim checks for a response from Billflash every 30 seconds.
Once a successful response is received, EZClaim generates the payment.

OfficePay Log
Whenever a transaction is initiated (for example, by clicking the OfficePay button to make a payment), you will be able to see its status in the log.
The status will be displayed here, even if the OfficePay window is closed before attempting the payment.
In other words, if you click on OfficePay but immediately close the window, that action will still be recorded here.
How to access the OfficePay Log
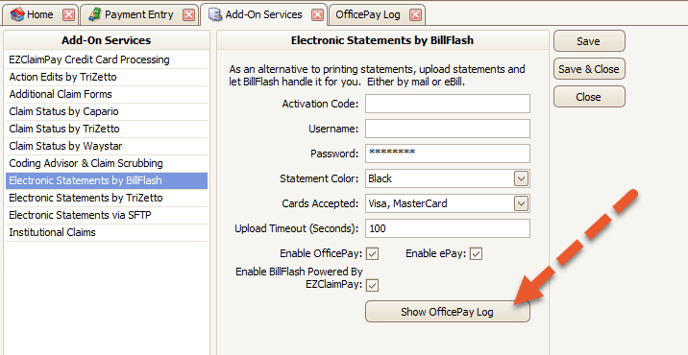
To access the OfficePay Log and view the queue, navigate to the Add On Services library.
Note: This requires the ADMIN password
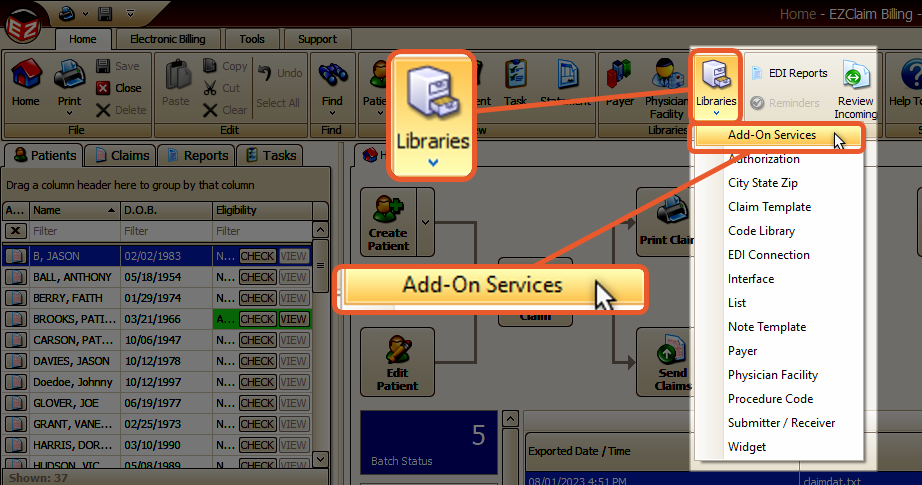
Select the Electronic Statements by BillFlash Add-On Service, then click the Show OfficePay Log button.
